Using the logo you created in Week 1 and the brochure you designed in Week 2, think about your brand and design packaging for your product. Remember that you can decide about the detail of your product. Is it dog biscuits, meat products in a tin, dry pellets or a new and exciting product?
Do your design according to the following steps:
1. Exploration
Use sketching techniques to draw thumbnails and hand in your thumbnails as scanned PDFs.
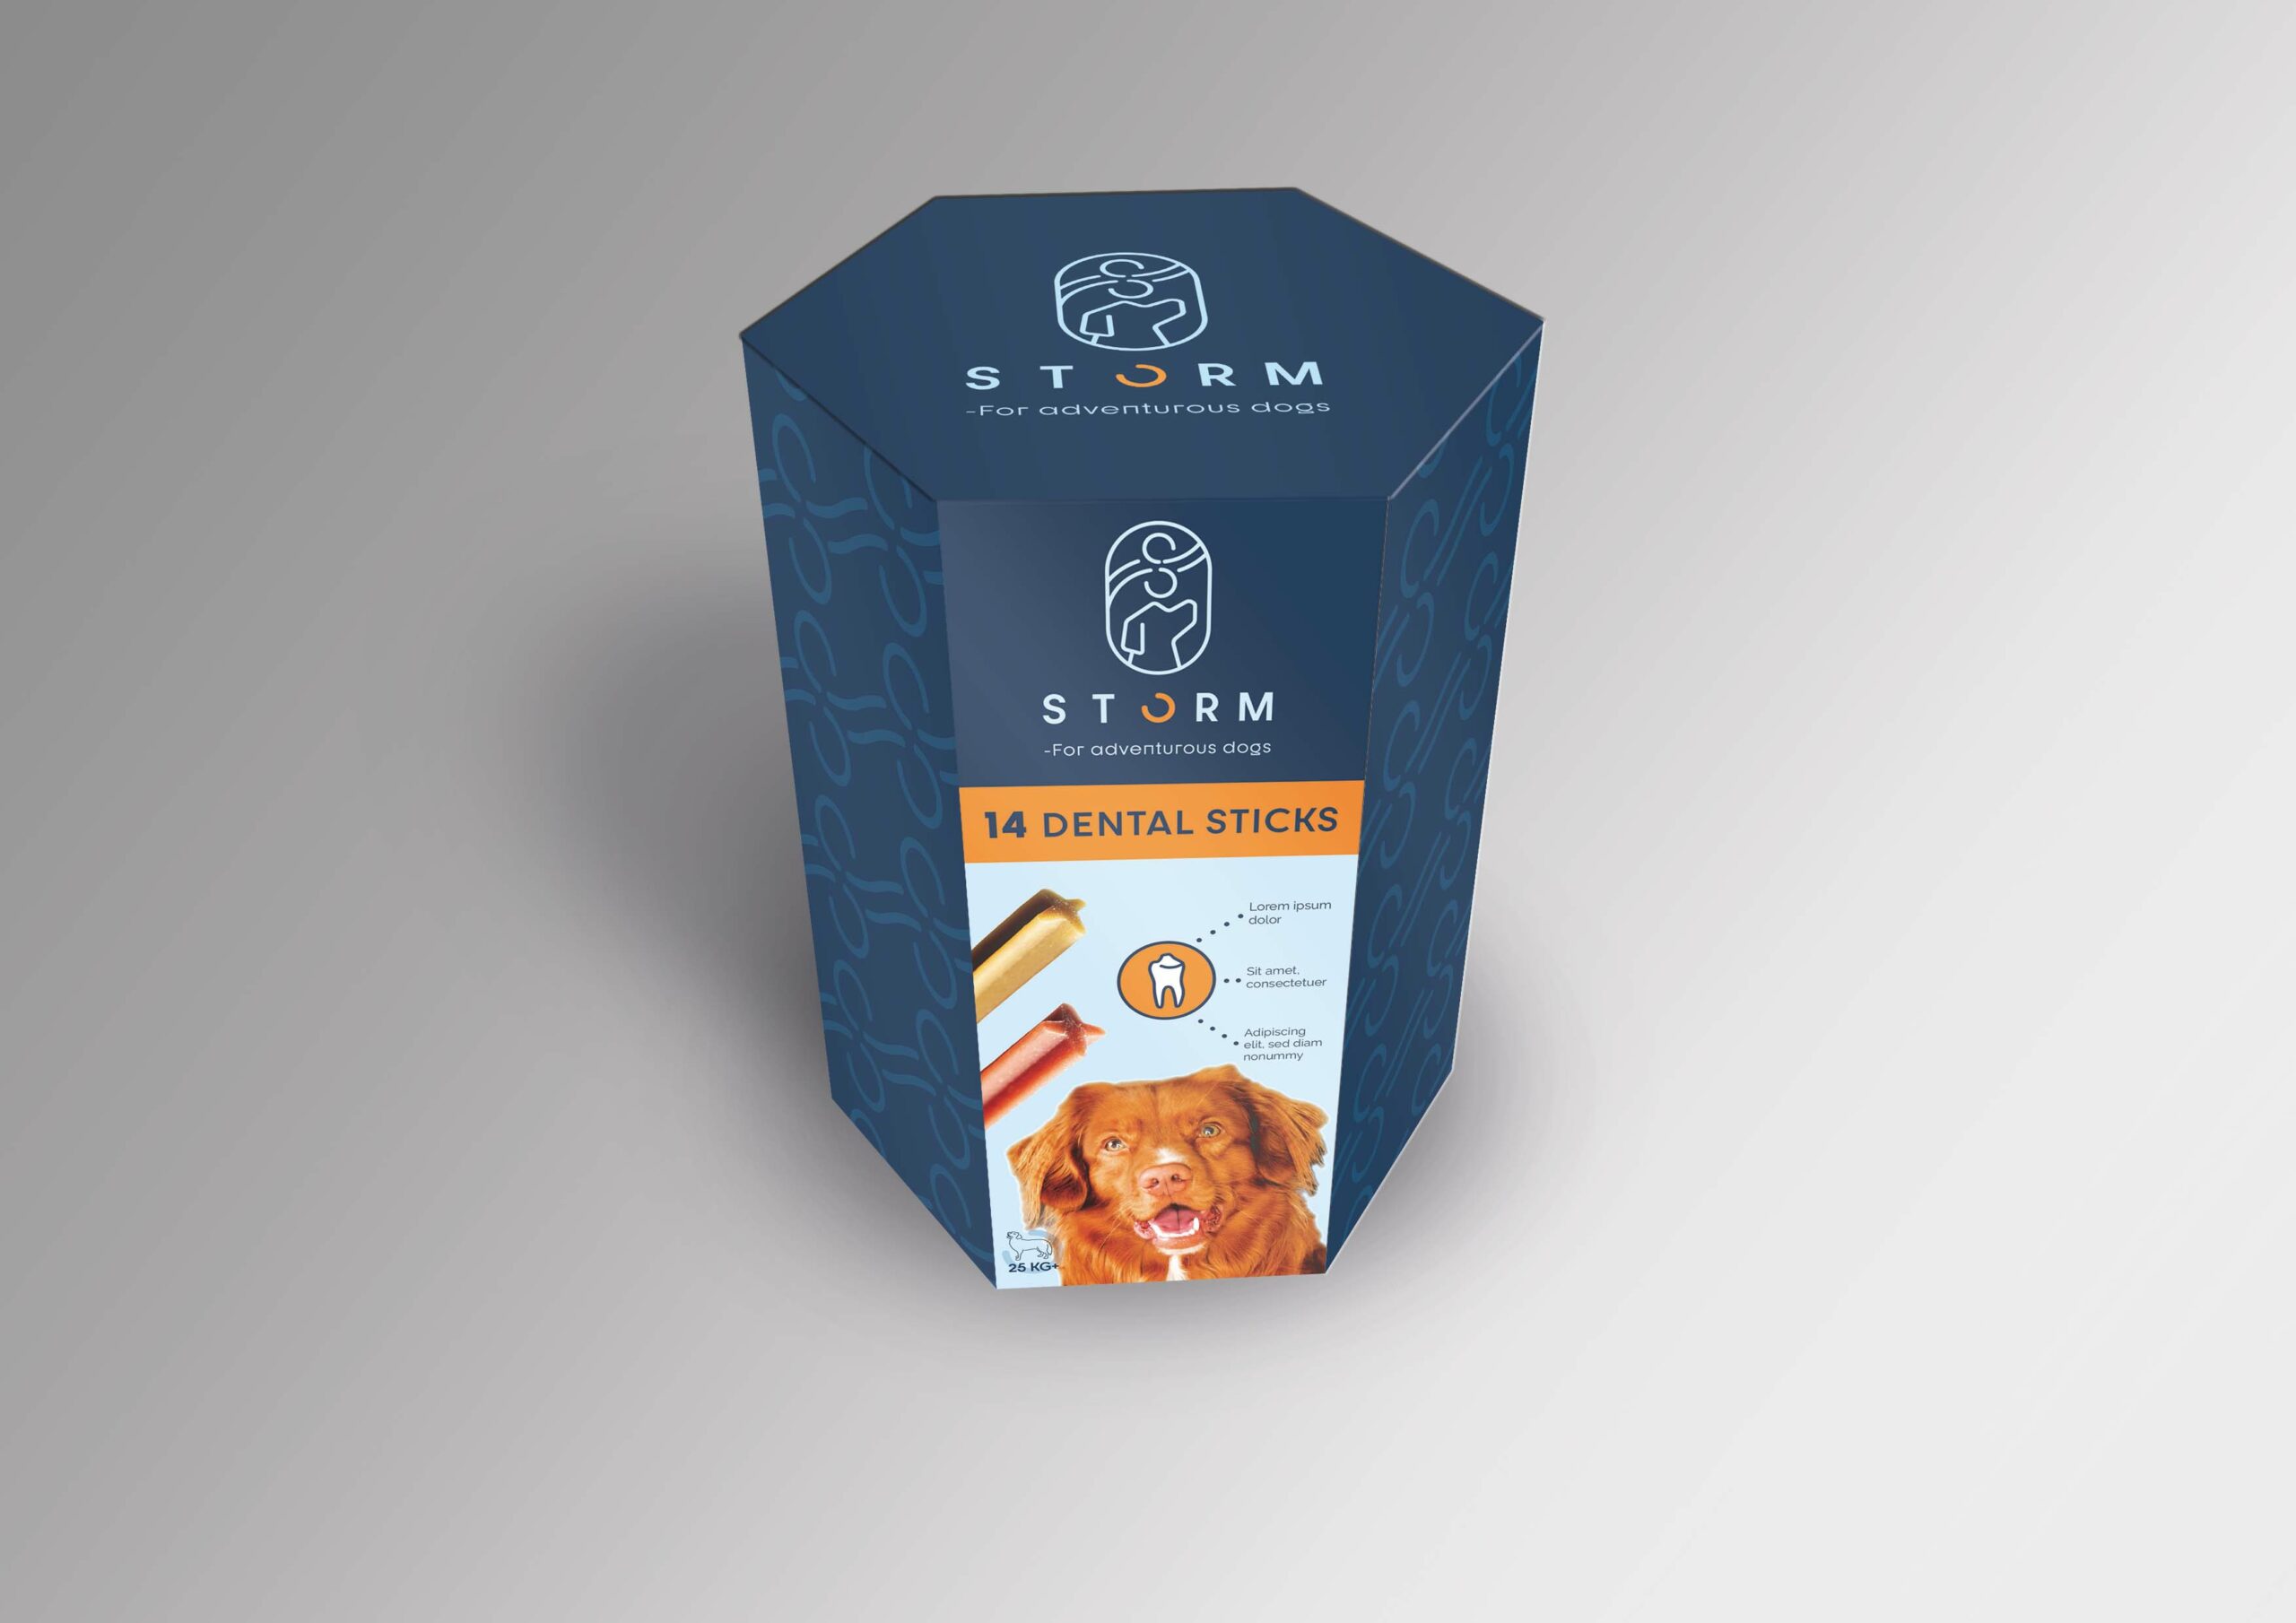
I chose to make packaging for dental sticks for dogs, and went for a hexagon shaped box.

2. Brand integration
Choose one of your thumbnails and refine your design. Place it next to your brochure and logo and see how you can merge your design with the brand identity. Also, what fundamentals of the brand can you draw from and use in your design? Hand in a picture of your thumbnails, mock-ups, logo and brochure together.


This is my result of the “brand integration” task. It was very helpful to have the brochure design and logo design next to the thumbnail sketch because it was easy to just grab content over the sketch. One downside of working like this is that the Ilustrator file gets so big that sometimes I had to wait for minutes for the file to save.

3. Design
Now design your packaging properly, using any design application of your choice (or a combination of e.g. Photoshop, InDesign and Illustrator). Export the flat design as a PDF.
For this task I had to go online and search for hexagon box templates, so that I had something to work from. I placed the image file of the box template on one layer and drew lines over it in another layer. I also measured a DentaStix box from Pedigree, as well as the DentaStix’ themselves so that my box had the right measurements.

Storm packaging flat design
Last ned PDF • 51.30MB
4. Presentation
Make a life-size mock-up of your final design and take photographs of it. Remember that you can take more than one photo to show the different angles and sides of the packaging. Here your presentation skills are vital. How do you present the final mock-up in a photo to reflect the true essence of your design?
For the life-size mock-up I used some pizza boxes and printed the dieline on several A4-sheets. When I was done printing them out, I attached them together with tape. The packaging design around the box was printed on sticker paper, to avoid bumps and creases from gluing.


Here you can see the pizza boxes that I used for this task.

I also made a mock-up from scratch in Photoshop, just to get a more crisp and clean presentation of the packaging design.


